
WillBrown Internet -


Project TLR200
All factory development work relating to twin-
Following the demise of the Brit road based trials machinery, twin-
Fast forwarding to the present though, there is a lot of interest in the older bikes,
and while P65 enthusiasts are well catered for, with the all the information and
special parts required to build a relatively competent machine being easily available,
the twinshock owner is not quite so lucky. In effect unless he or she knows exactly
what to do, or wants to build a twinshock machine around one of the retro chassis
kits mentioned earlier, other than the basic guidelines provided elsewhere on this
site, there is very little information to help anyone wanting to improve/update a
twin-
This being the case we have decided to take a rather tatty (but mechanically 100%
sound) recently imported TLR200 Honda and outline exactly what is required to turn
it into a competitive and reliable twin-
Please feel free to email if you need help or advice with your own Honda or Fantic project, but please don’t phone unless you are interested in parts or services, as we are always very busy and simply don’t have the time to provide in depth answers on the phone.
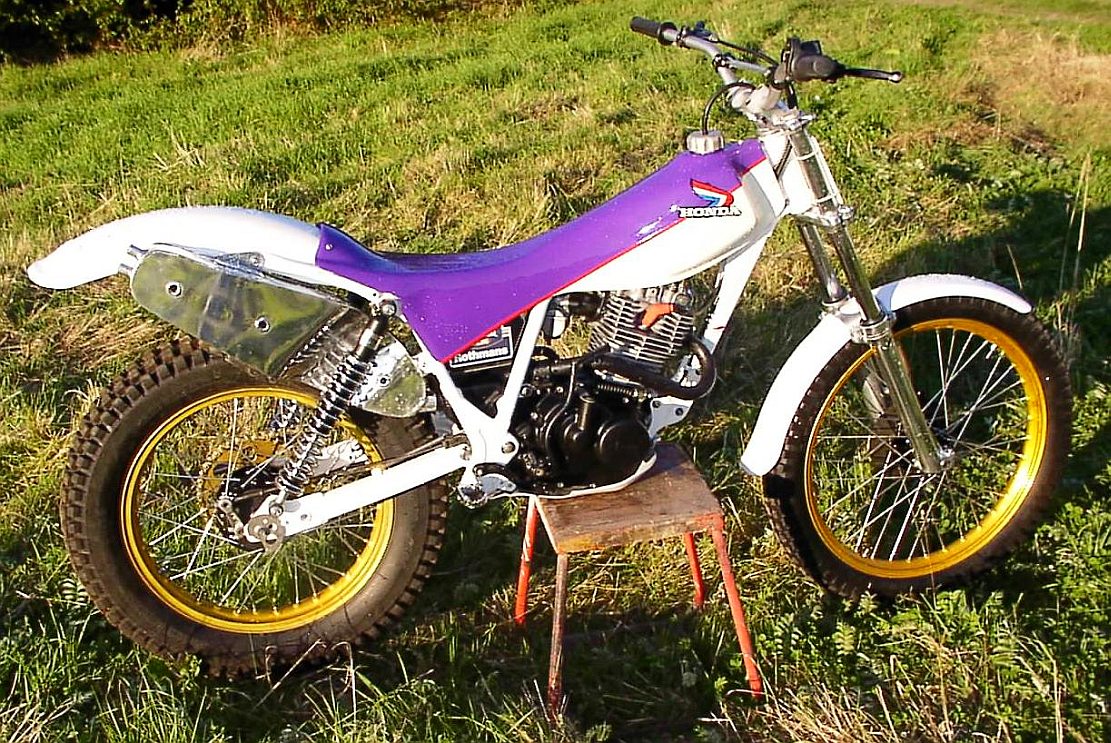
Recently imported TLR200
Click to enlarge

Introduction
The intention of the following is to provide anyone who owns a TLR200 (most info also applies to the 250), with some accurate and relatively detailed information to help with upgrading and improving their bike, so that its quite possible to end up with a capable and enjoyable twinshock trials bike, rather than the rather dull and underpowered trail bike that is pictured at the beginning of this page. Other than the chassis changes, and some in depth engine and fabrication work that is mentioned, all that’s outlined here can be carried out by any relatively competent person, able to use simple hand tools.
For anyone wanting to modify/upgrade their TLR the order in which they go about it is largely a matter of personal choice, but it is possibly a good idea to approach changes to the motor first, as the potential of the TLR can be far better appreciated with a motor that has more get up and go than the somewhat lethargic unmodified standard units.
Finally there is all manner of nonsense to be found on the internet relating to trials machinery, ranging from “expert” advice on carburetion (only really of value to riders of old 1970s MX bikes), to suggestions that running problems on Honda trials bikes are due to unspecified issues with valve springs or cam timing. Caution needs to be exercised here as taking rubbish like this seriously will if you are lucky, merely result in a few wasted hours in the workshop, but may equally as easily result in a large repair bill, and considerable amounts of aggravation!
Part 1: Induction
Having carried out an initial dyno run on the recently imported TLR pictured earlier on this page, we have determined that even though the overall cosmetic condition of the bike is rather tatty, the motor runs very well indeed, and being a recent direct import from Japan, very likely hasn’t done a great deal of work from new. Bikes in this sort of condition are relatively common, and a recent direct import is always a good choice as its far easier to sort out minor cosmetic issues, than to get involved with rebuilding badly worn motors, which are far more likely after the years of hard use and possible neglect that is often the case when UK bikes are being considered.
After ensuring ourselves that the motor on our project bike is sound, and producing the same sort of rear wheel horse power as several other bikes we have tested previously, we need to look at what can be done to improve things. One of the main problems with these motors is that Honda seems to have included intake restrictions, possibly to lessen the chances of engine damage when bikes are being used in dual purpose roles. The effect of these restrictions is to reduce the capability of the motors to rev cleanly, almost as though a rev limiter has been fitted to the ignition. Lack of performance is often compounded by the fitment of poorly designed aftermarket exhaust back boxes, with excessive back pressure, which further reduce output.
We have found that fitting a Classictrial OKO Powerjet carb kit, with corresponding changes to the air box system, means the intake restrictions are no longer a problem, and the bikes are far smoother and more powerful at lower engine speeds, as well as working far better at higher rpm, which often allows the motor to pull the next higher gear in competition conditions.
OKO 24mm carb fitted to TLR
Click to enlarge
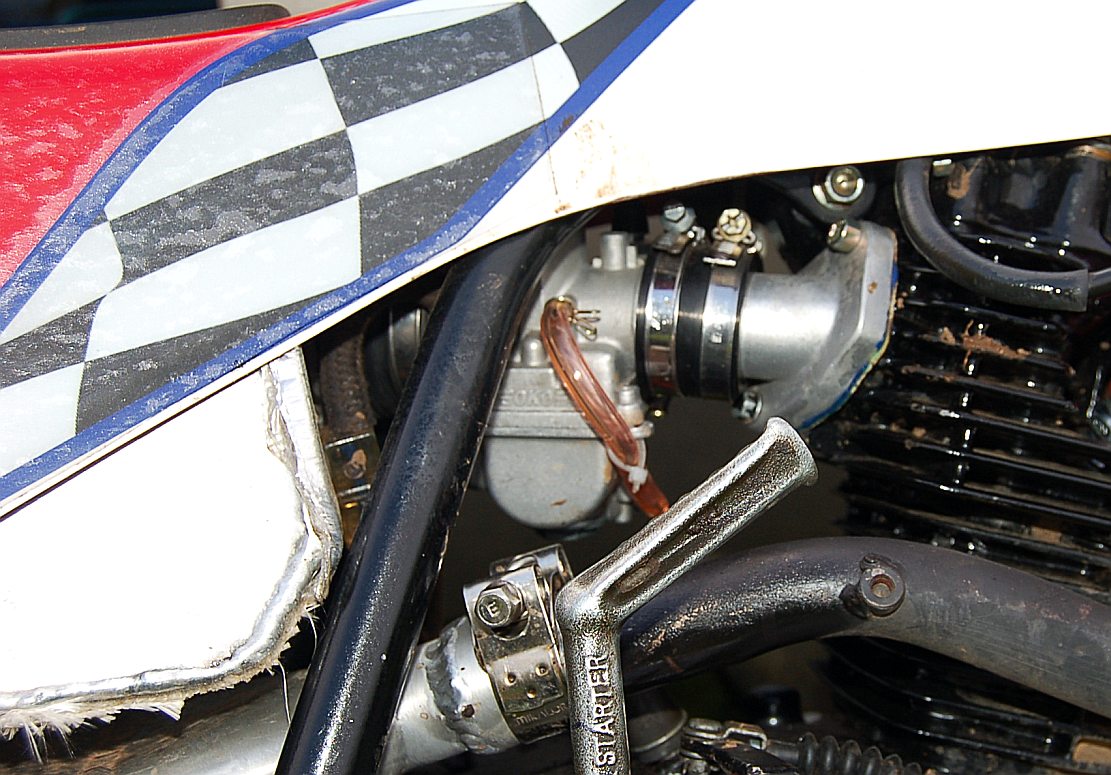
For anyone needing to stay with a worn out OE Keihin carb, running can be improved slightly by fitting a new jet needle and needle jet, carefully checking for porous floats, and replacing float needle valve if there are any signs of wear. Carb wear is particularly troublesome on the TLR250 as greater intake depression accentuates any wear in the carb, which can result in hesitation, spitting back, and poor pick up from low engine speeds.
The standard air cleaner/flame-
Shape and dimensions of the intake ports on Honda TLR head castings are not ideal for trials applications, and modifications here have worked very well indeed when we have experimented with them in the past. However carrying out these modifications properly is very time consuming, and needs to be done with great accuracy, so while this is certainly something worth mentioning, the high costs involved mean these changes are only likely to appeal to a very few riders, so will not be carried out on the project bike.
However for anyone who is overhauling their engine for any reason, fitting a larger inlet valve is certainly worth looking at, and will work well in conjunction with a 30 degree back cut above the 45 degree seating area of the valve, and a properly carried out 3 angle valve seat job on the head. This work must be carried out by a competent engineer, as it is very easy to end up with losses rather than gains if the work is not done properly.
Early prototype Classictrial exhaust back box.
Click to enlarge
Part 2: Exhaust
We have already carried out a fair bit of experimentation with exhausts on the TLR, and have found that in general the stock steel system works very well indeed, and all of the rather restrictive aftermarket systems we have tried would seem to result in reduced torque, and less top end power. However at the moment there is no real alternative to the aftermarket TLR systems, unless it is possible for the owner to either fabricate from scratch an RTL style system, as we have done in the past, or to modify a 4T back box from an MX bike, and fabricate free flowing pipe work and resonator to connect it to the front pipe. But anyone wanting to fabricate a system from scratch needs to look very carefully at the works type Honda systems, and try to avoid unnecessary restrictions, and the use of inappropriate materials.
However as we already know what is needed exhaust wise to help with improving the TLR a great deal, a production replacement system is certainly feasible, but the cost of this will probably mean its something that would only be produced in very small numbers, and solely fitted to development bikes. There is every possibility of special high torque front pipe being produced however, and while not providing the same benefits as a complete trials specific system, would mean improved low and mid range running.
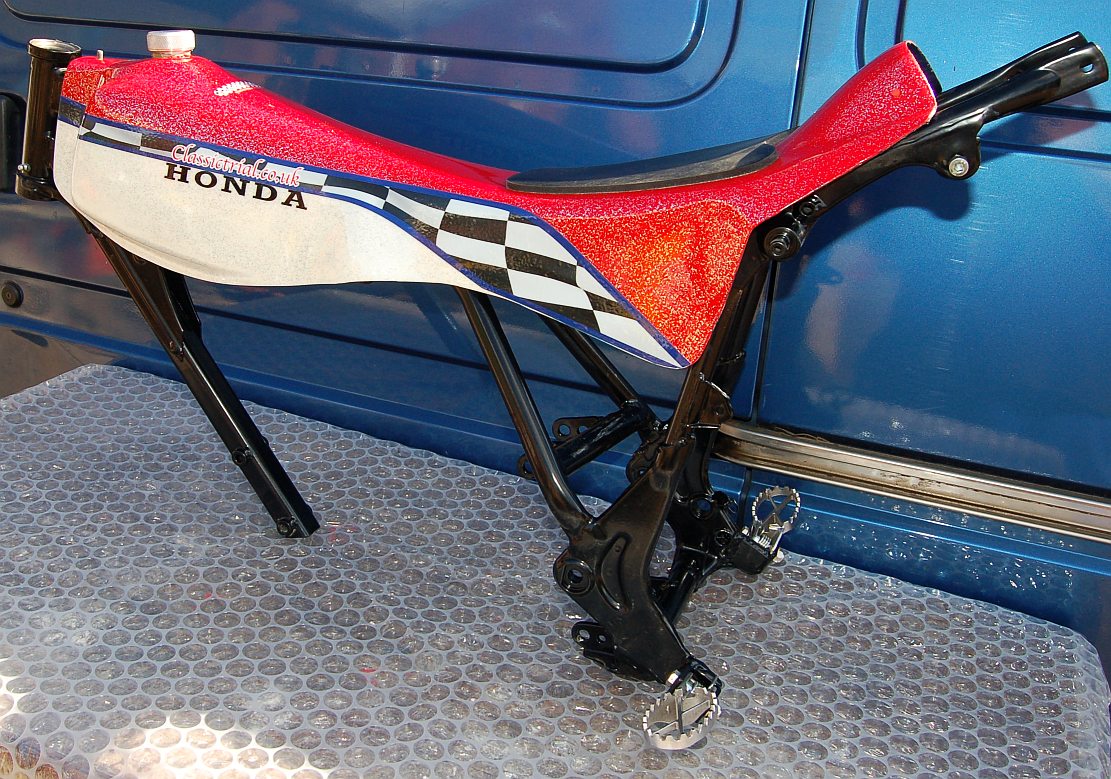
Classictrial modified TLR chassis with optional tank and footrest kit.
Click to enlarge
Part 3: Chassis
In standard form the TLR200/250 chassis is perfectly ok for the dual purpose role it was originally designed to fulfill, but for serious competition use it is compromised greatly by a somewhat relaxed steering angle, very narrow footrests which are in the wrong position, and bulky steel tank, with separate seat and side panel arrangement. Altering the steering angle is something that some internet experts suggest can be achieved by sawing through the top tube, and then riding the bike into a brick wall. This is something that may indeed have been commonly carried out on the heavy old Brit road based trials machines, but which will almost certainly result in permanent damage if it is attempted on a TLR.
As well as changes to the steering angle the narrow stock cheese grater footrests must be removed, the mounting area reinforced and new mountings to accept modern footrests welded into place lower and further back than the stock position (this doesn’t apply to the 250, which needs footrest mounts moved forward). The welded up pressed steel fabrication which forms the swinging arm pivot and footrest mounting locations is relatively weak so needs to be reinforced if reliable and dependable footrest positioning is required. Choice of footrests is obviously up to the individual, but unless very gentle club trials are the only likely place the bike is going to be used it’s perhaps best to avoid the very bottom end of the footrest market, as failures here can have catastrophic consequences.
Our development bike has had the steering angle properly modified using specific purpose made alignment jig, has also benefited from changes to the stock footrests outlined above, and uses a special lightweight version of the Classictrial GRP tank/seat unit, with the chassis being finished in BS approved satin black powder coat. We are able to provide all of the chassis changes carried out on the development bike, in combination with a tank/seat in several alternative colour choices, at a very special price, which may be of interest to anyone who is looking for improved handling, and who doesn’t already have a GRP tank/seat fitted.
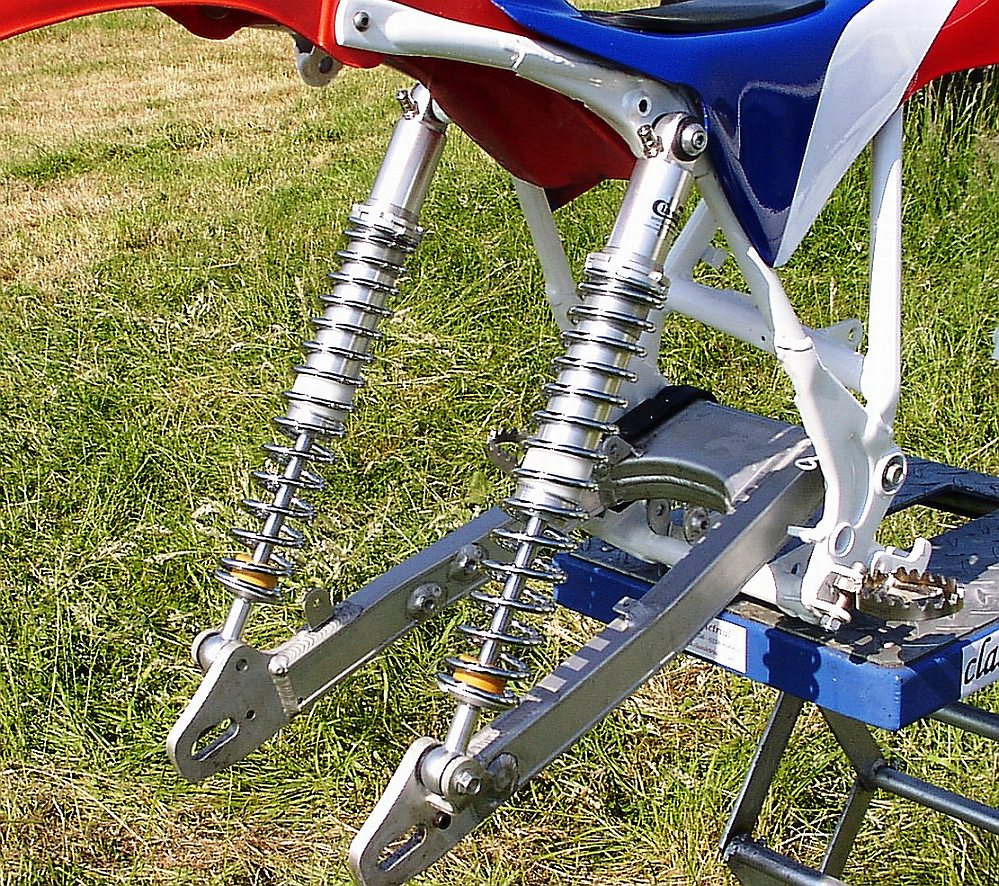
Finally after investigating production of TLR200/250, 6000 series alloy swinging arms early in 2005, we have now located someone able to produce these in the correct 7020 series extruded box section material, and will shortly be offering these for sale. We will also be able to provide a slightly longer swinging arm for riders of TLR250s’, who might find that the front end of their bikes is a little too light for predictable and sure handling. We have already carried out a fair bit of experimentation with exhausts on the TLR, and have found that in general the stock steel system works very well indeed, and all of the rather restrictive aftermarket systems we have tried would seem to result in reduced torque, and less top end power. However at the moment there is no real alternative to the aftermarket TLR systems, unless it is possible for the owner to either fabricate from scratch an RTL style system, as we have done in the past, or to modify a 4T back box from an MX bike, and fabricate free flowing pipe work and resonator to connect it to the front pipe. But anyone wanting to fabricate a system from scratch needs to look very carefully at the works type Honda systems, and try to avoid unnecessary restrictions, and the use of inappropriate materials.
However as we already know what is needed exhaust wise to help with improving the TLR a great deal, a production replacement system is certainly feasible, but the cost of this will probably mean its something that would only be produced in very small numbers, and solely fitted to development bikes. There is every possibility of special high torque front pipe being produced however, and while not providing the same benefits as a complete trials specific system, would mean improved low and mid range running.
Part 4: Brakes, Wheels
In standard form braking on the TLR200 is not tremendously effective, but can be improved to some extent by fitting new genuine Honda front brake cable if there is a pattern one fitted, or the OE one is not moving completely freely. The choice of brake shoes is also important, as many pattern parts leave a lot to be desired with very hard lining material, which simply doesn’t work in trials applications. However on our project bike the stock lining material has been replaced by Saftek, who at the same time have machined the shoes, assembled on the brake backing plates, to the exact diameter of the brake drums, which provides much improved braking over the rather poor stock set up.
It is quite possible to fit an adapted 35mm disc front end from a later bike to the TLR, but we have not considered this as the ACU does not allow disc brakes in national status “Traditional” events. The choice of wheels for TLR is largely restricted to various tube type rims, as 36 hole tubeless rear rims are getting difficult to find now, and used ones are sometimes in poor condition. A possible solution to this is to modify the stock 36 hole rear hub to 32 hole configuration, allowing fitment of easily available modern rims and reducing the weight a little at the same time.
Part 5: Controls
Currently the project bike is using stock 22mm bars, but as we have found machine control and feel on Fantic is much improved by adapting the top yoke to accept 28mm “Fatbars”, this is something that will be carried out on the Honda in due course. The standard Honda throttle control and handlebar levers work very well indeed, and if these are in good condition there is no real need to change them. Rear brake pedal benefits from having the teeth on the operating tip sharpened with a triangular file to improve feel in muddy conditions, and the lever may need to be shortened if footrests have been moved further back than the ideal position.
HRC 7000 series swinging arm, and Falcon alloy shocks.
Click to enlarge
Part 6: Suspension
Many people think that first-
Front forks on the TLR200 often seem very soft, and those on our project have been
up-
However the main thing that needs to be looked at in regard to suspension is that
this needs to be set up to suit each riders specific requirements, and that doing
this properly very often cannot be achieved by increasing the shock pre-
Part 7: Final set up
This part of the process has to do with making sure the finished bike is properly set up, and is adjusted to work as well as it possibly can for the rider who will be using it in competition. For example it’s of limited value to have a great looking machine, which stops and handles well, if the carburetion is miles out, the bike has little power and commonly spits back and stalls on difficult going. In a nutshell this is the reason why final set up is so very important, and while this process is relatively hassle free for someone who has been working on trials machines for many years, its something that can be very difficult for newcomers, or for anyone not familiar with working on older bikes.
This final setup work is sometimes made extremely difficult by other factors, mainly to do with people trying to save money or cut corners by not doing things properly. In relation to this final set up, in some cases if there are any major problems it may be worthwhile seeking professional assistance, as lack of experience can sometimes make this work very time consuming, or in some cases quite impossible. Classictrial cannot assist with this (unless bike is ground up built by ourselves), but there are many specialist dealers who may well be pleased to help.
Part 8: Conclusions
When our project bike is finally completed, several images will be provided here, and the machine will also be dyno tested, which will allow direct comparison with the results obtained when the bike was initially tested on in totally standard form. This type of testing is relevant in real world terms, and deserves to be regarded somewhat more seriously than the claims of the vendors of many trials related parts, some of which are shoddily made and simply don’t work very well.
*Finally please remember that all of the above information is provided on the strict proviso that any modifications or changes not carried out specifically by Classictrial, are not guaranteed or warranted in any way, and are entirely the responsibility of the individual carrying them out, and that Classictrial are not responsible in any circumstances for damage or injury, that may occur as a result of poor workmanship*
TLR200, OKO 24mm Powerjet
carb, with custom air box
Click to enlarge

